DIY, Farmhouse-Styled Dollhouse Makeover and a Giveaway!
This post is in partnership with the fantastic Miniatures.com! All opinions are my own. Please see full disclosure policy for more info.
Giveaway is closed. Please see my Instagram feed for the winner announcement. Thanks so much to all who entered!
Hey sweet friends! Thanks for stopping by today! Before I tell you about this really fun makeover and giveaway, I wanted to remind you all to come find me on Instagram, Facebook and Pinterest, so you don’t miss another blog post! ;)
****************************************************************
First, I should probably mention that I don't claim to be a professional at the art of dollhouse renos....I'm just someone who jumped at a fun opportunity! If I can do them, so can YOU!
Okay, let's get started! I found an old, delapidated dollhouse (last year, but who's counting?) at an antique store that was going out of business, and almost everything in that store was 75% off! So, of course, I had to pick up all the dollhouse-related items!
When I bought this dollhouse last year, I wasn't sure how I'd renovate it. (Hey...when you find the deal of the century, you're not gonna pass it up, right?!) So, while at Haven this past Summer, I met some sweet ladies from Miniatures.com. This dollhouse co. sells the coolest pieces for all-things dollhouse! You have GOT to check out their website. There are so many fun items to see! And because they're such a fun shop, I had the privilege of collaborating with them on giving our dollhouse the ultimate makeover. I've linked the pieces in this post to their website, so be sure to check them out when you're finished reading!
So here's a "before" picture of the dollhouse cottage....
And a "before" pic of the back...
As you can see, it was a tired, little cottage that needed some tlc.
I wanted to give it a farmhouse look, so first, I painted the outside using a wooden-handled sponge brush and some white chalk paint. I also removed some of the excess trim pieces that needed to go.
Did you notice those windows on the left side? Yep. The clear plastic inserts are missing. They'll just have to happen at a later date. But for now, can we pretend that the cute, white designs on the plastic windows is evenly placed on both sides of the cottage? ;)
Did you notice the modern, white light (12V White Canopy Light) just above the front door? Isn't it a fun, farmhouse touch?! And the wreath is just one long strand of faux greenery from a crafts' store. My daughter bent the greenery, tied the ends tightly with some twine, and then taped the completed wreath to the door.
For the flooring, I simply cut the ends off popsicle sticks and then played around with different patterns to get the flooring "just right." Once I was happy with the layout, I then used some strong glue to adhere the sticks to the floor. It was time-consuming, but very easy to do and very worth it!
Next, I used some decoupage to adhere some carrara-marble-style paper to the wall of the master bedroom. Again, it was a little time-consuming, but I love the outcome!
Okay, so once the basics were complete, it was time for the fun part...the accessorizing!
Since there are so many delicate details to discuss with this dollhouse, we're going to break it down, room by room. ;)
Master Bedroom
Do you see that cute washboard mounted to the wall in the pic below? I just used some strong glue to adhere it to the wall, and it easily stuck to the surface!
And that black, coach "sconce" lamp? It actually works!
The "Enjoy the little things" wall art is actually just a faux-wood sticker from my local crafts' store! How fitting is that wall art for this miniature home?! ;)
This cute, black iron bed came with all the gingham-checked bedding, a bedside table AND the fun bench at the foot of the bed....I thought the Paris throw pillow would be a good accessory throughout the house, especially on the bed. ;) The rug is just a doily from the dollar store.
The potted aloe plant and books are a fun touch to this modern farmhouse bedroom. (Those books actually come in a set of four!) If you're on your mobile device, be sure to zoom in and take a look at this tiny crate turned upside down and used as a tray. It's holding a small basket of cherries, a white vase, and a little book that wasn't the right color for my decor, so I just painted it white. And the drapes? They're napkins that have been tied back with some twine and stapled to the wall. Easy peasy!
Craft/Blog Room
With this room, I wanted to keep it simple. I love the clean, white floors (again, painted popsicle sticks that were simply glued to the floor!), the vintage secretary desk and the old sewing machine. All the pieces you see in the pic below (except for the wall art and the books) were bought at the same antique store.
Kitchen
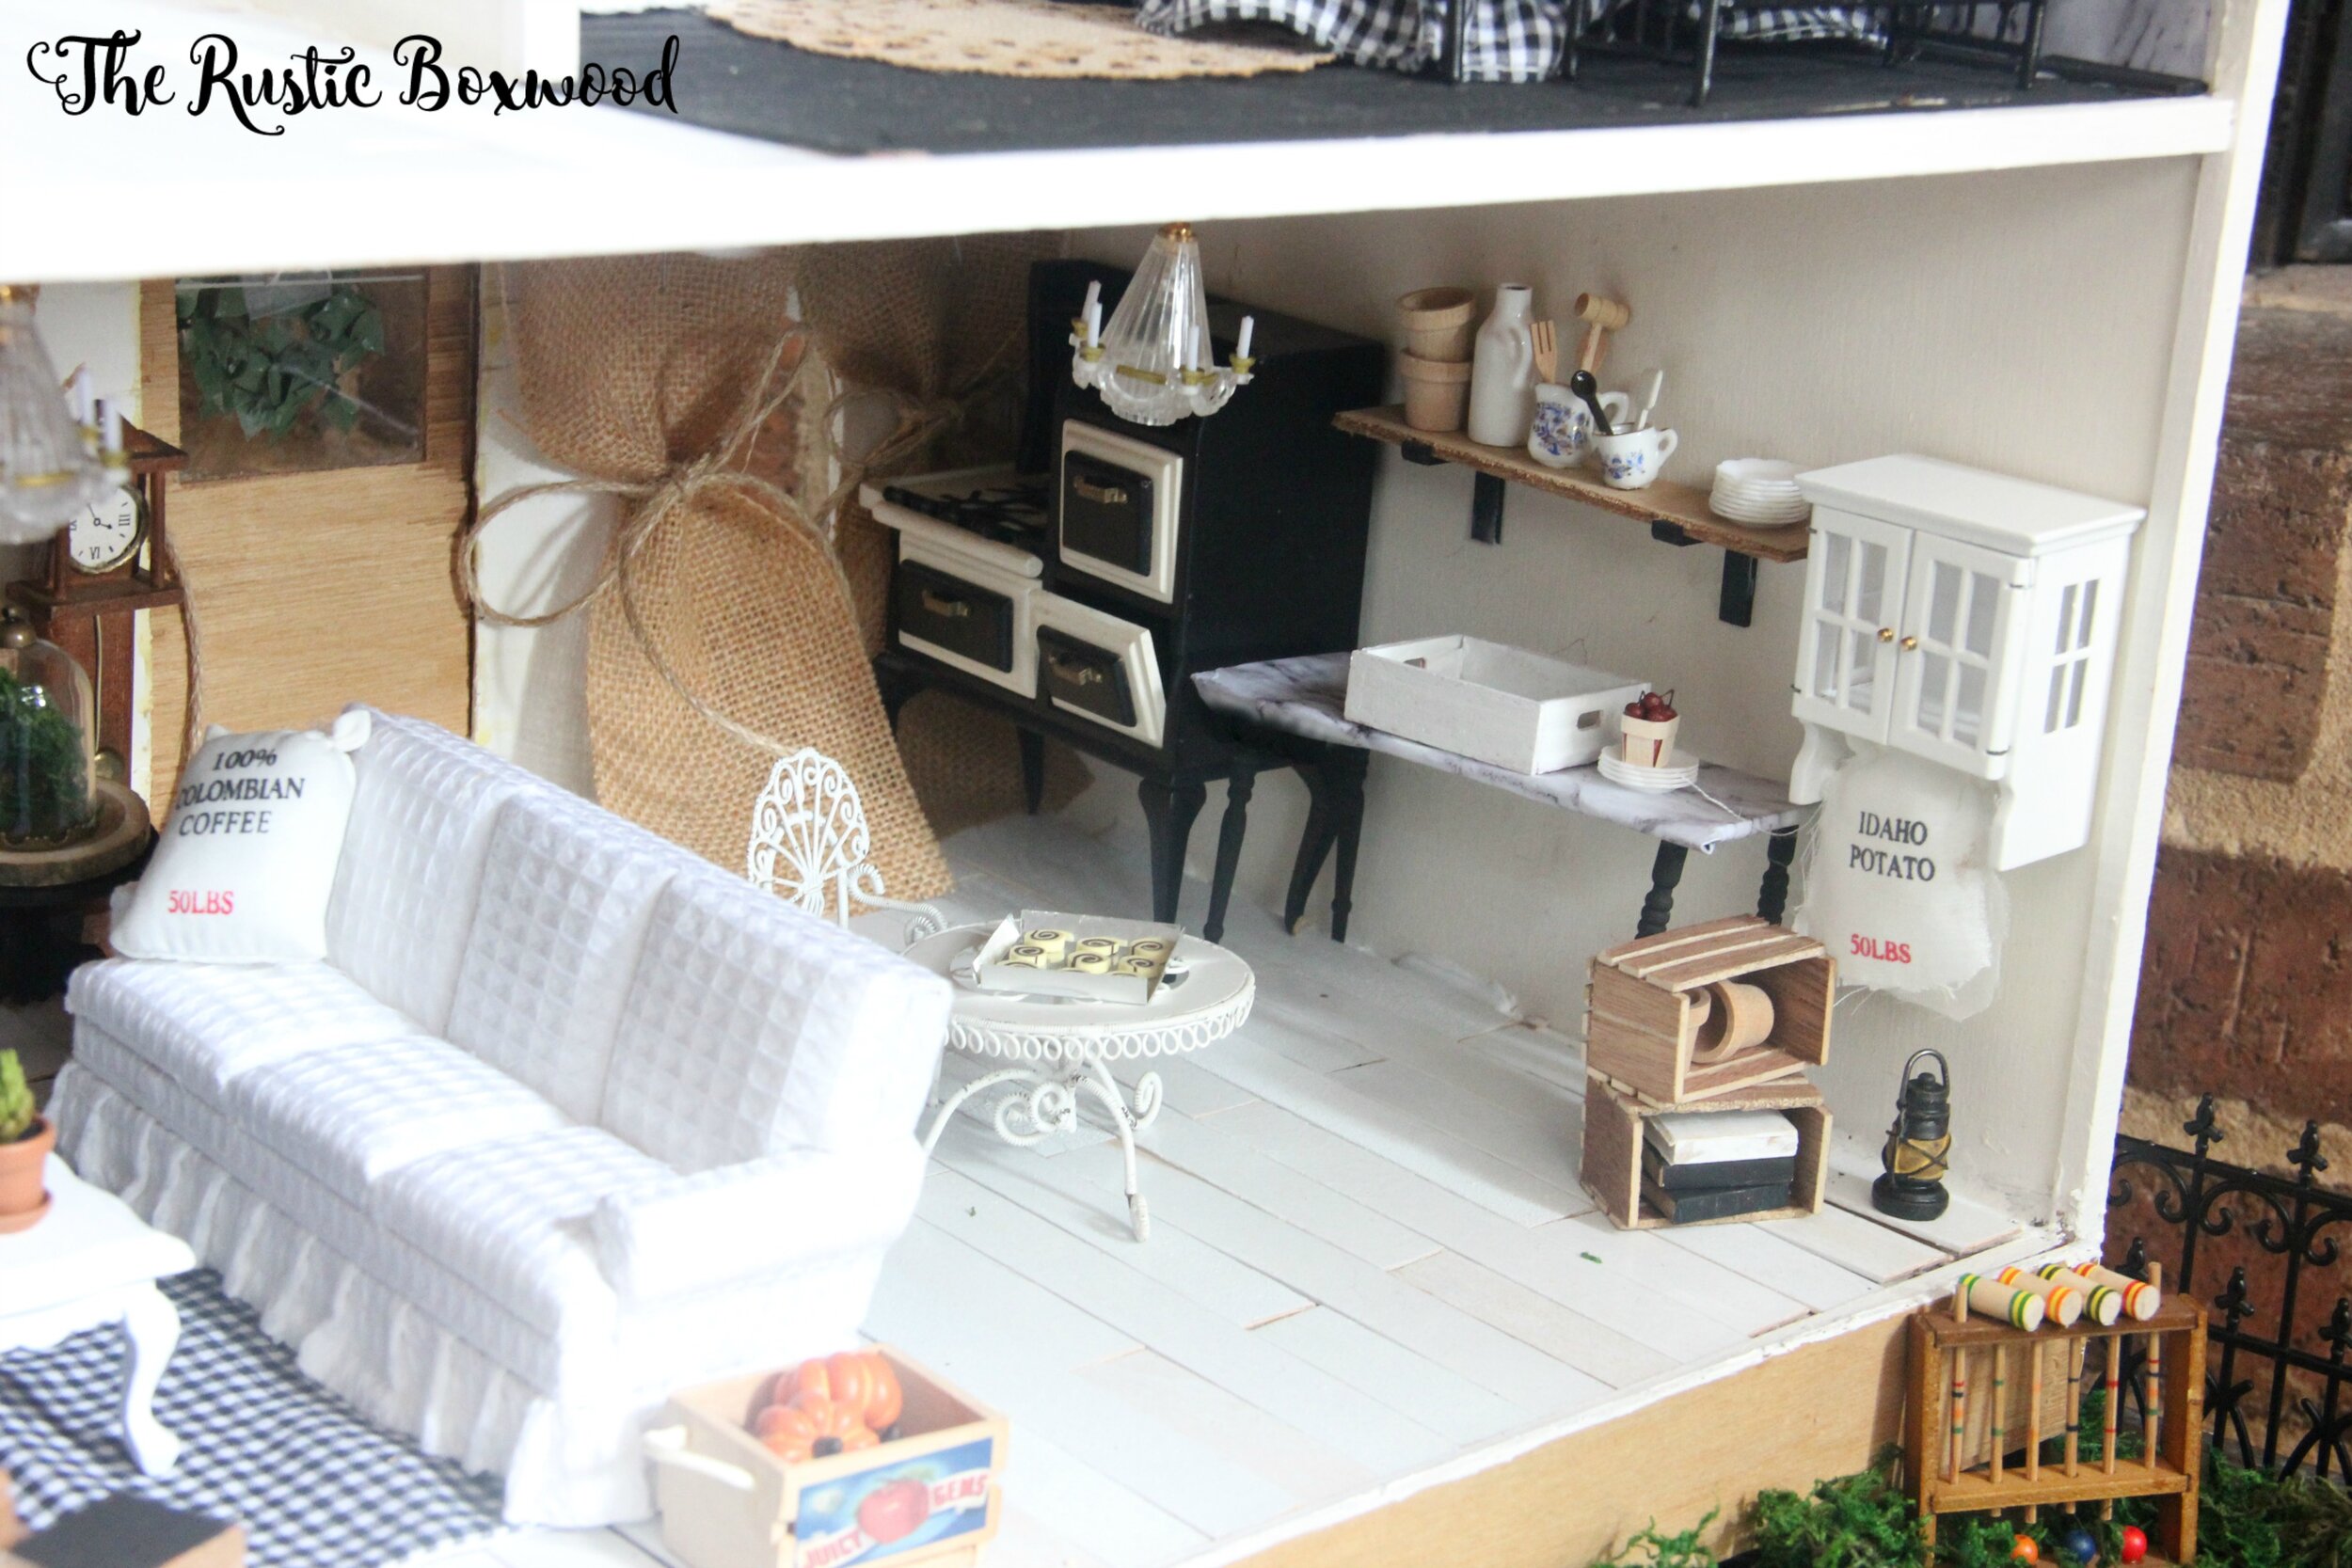
If you'll notice in the "progress" pic of the dollhouse, there was a wall that divided the downstairs living area. I wanted an open concept room, so out came that wall! A lot of the kitchen became a create-as-you-go type of space, because I didn't have some of the basics that I needed for this farmhouse kitchen. You know that old saying, "Necessity is the mother of invention," and that sure was true for me during this part of the makeover! Since I didn't have a sink, I grabbed one of the extra crates that I bought at the antique store and painted it white. That became my "apron" sink. Some of the leftover marble scrapbook paper was decoupaged onto a piece of cardboard to make the countertop, and the legs were actually railing pieces that I painted black and glued to the underside of the countertop.
I absolutely LOVE the battery-operated, hanging chandelier! And it works, too! ;) It actually attaches to the ceiling with the provided 3m tape. No wires to worry about! And for the drapes, I used a burlap bandana and cut the sizes that I needed, tied them with twine, and then stapled them to the wall.
That freestanding, white cabinet with towel bars was perfect for holding the DIY, feedsack hand towel. (All I did was cut the side edges open on some of the 6 mill bags.) By the way, the doors do work!
The 2 produce crates turned on their sides are fun decor accents. I might mount them to the wall in the future to act as bookshelves.
Speaking of bookshelves, the open shelving above the sink is a fun and modern, farmhouse-style touch. The black brackets come as a set of 4, and you can order all types of sizes for your wood shelf! The shelf I ordered is currently on backorder, so I found a random piece of wood leftover from some of the previous owner's roofing material for this house.
Let's focus on those cute porcelain cups (in the pic below) that are holding the mini, wood kitchen tools. I love the little specks of gold that reflect the natural light!
Every farmhouse HAS to have white plates. It's a must. ;) So, right when I found this stack of 12, white dinner plates, I knew I had to have them! They're so versatile....You can spread them out on different surfaces of the dollhouse, and use them as decor (e.g. see to the right of the kitchen tools), or you could use them as fruit plates (e.g. see to the right of the sink). Or you can mount them individually to the wall using tape. (They're super-lighweight!)
Family Room
This room looks so much more open after removing that middle wall! It seamlessly flows from the kitchen, with having the same popsicle-stick flooring and neutral decor that blends with the rest of the dollhouse. It's not perfect by any means, but it sure is fun to play with!
The coffee table (that came with the sofa set) was originally a natural brown color, but I painted it using the same white chalk paint that I used for the flooring. And that black-and-white gingham "rug" is actually a blanket that came with the bedding set upstairs.
The windsor bench was originally a walnut color, but of course, I used the black chalkboard paint that I used on the flooring for the master bedroom, and I love it!
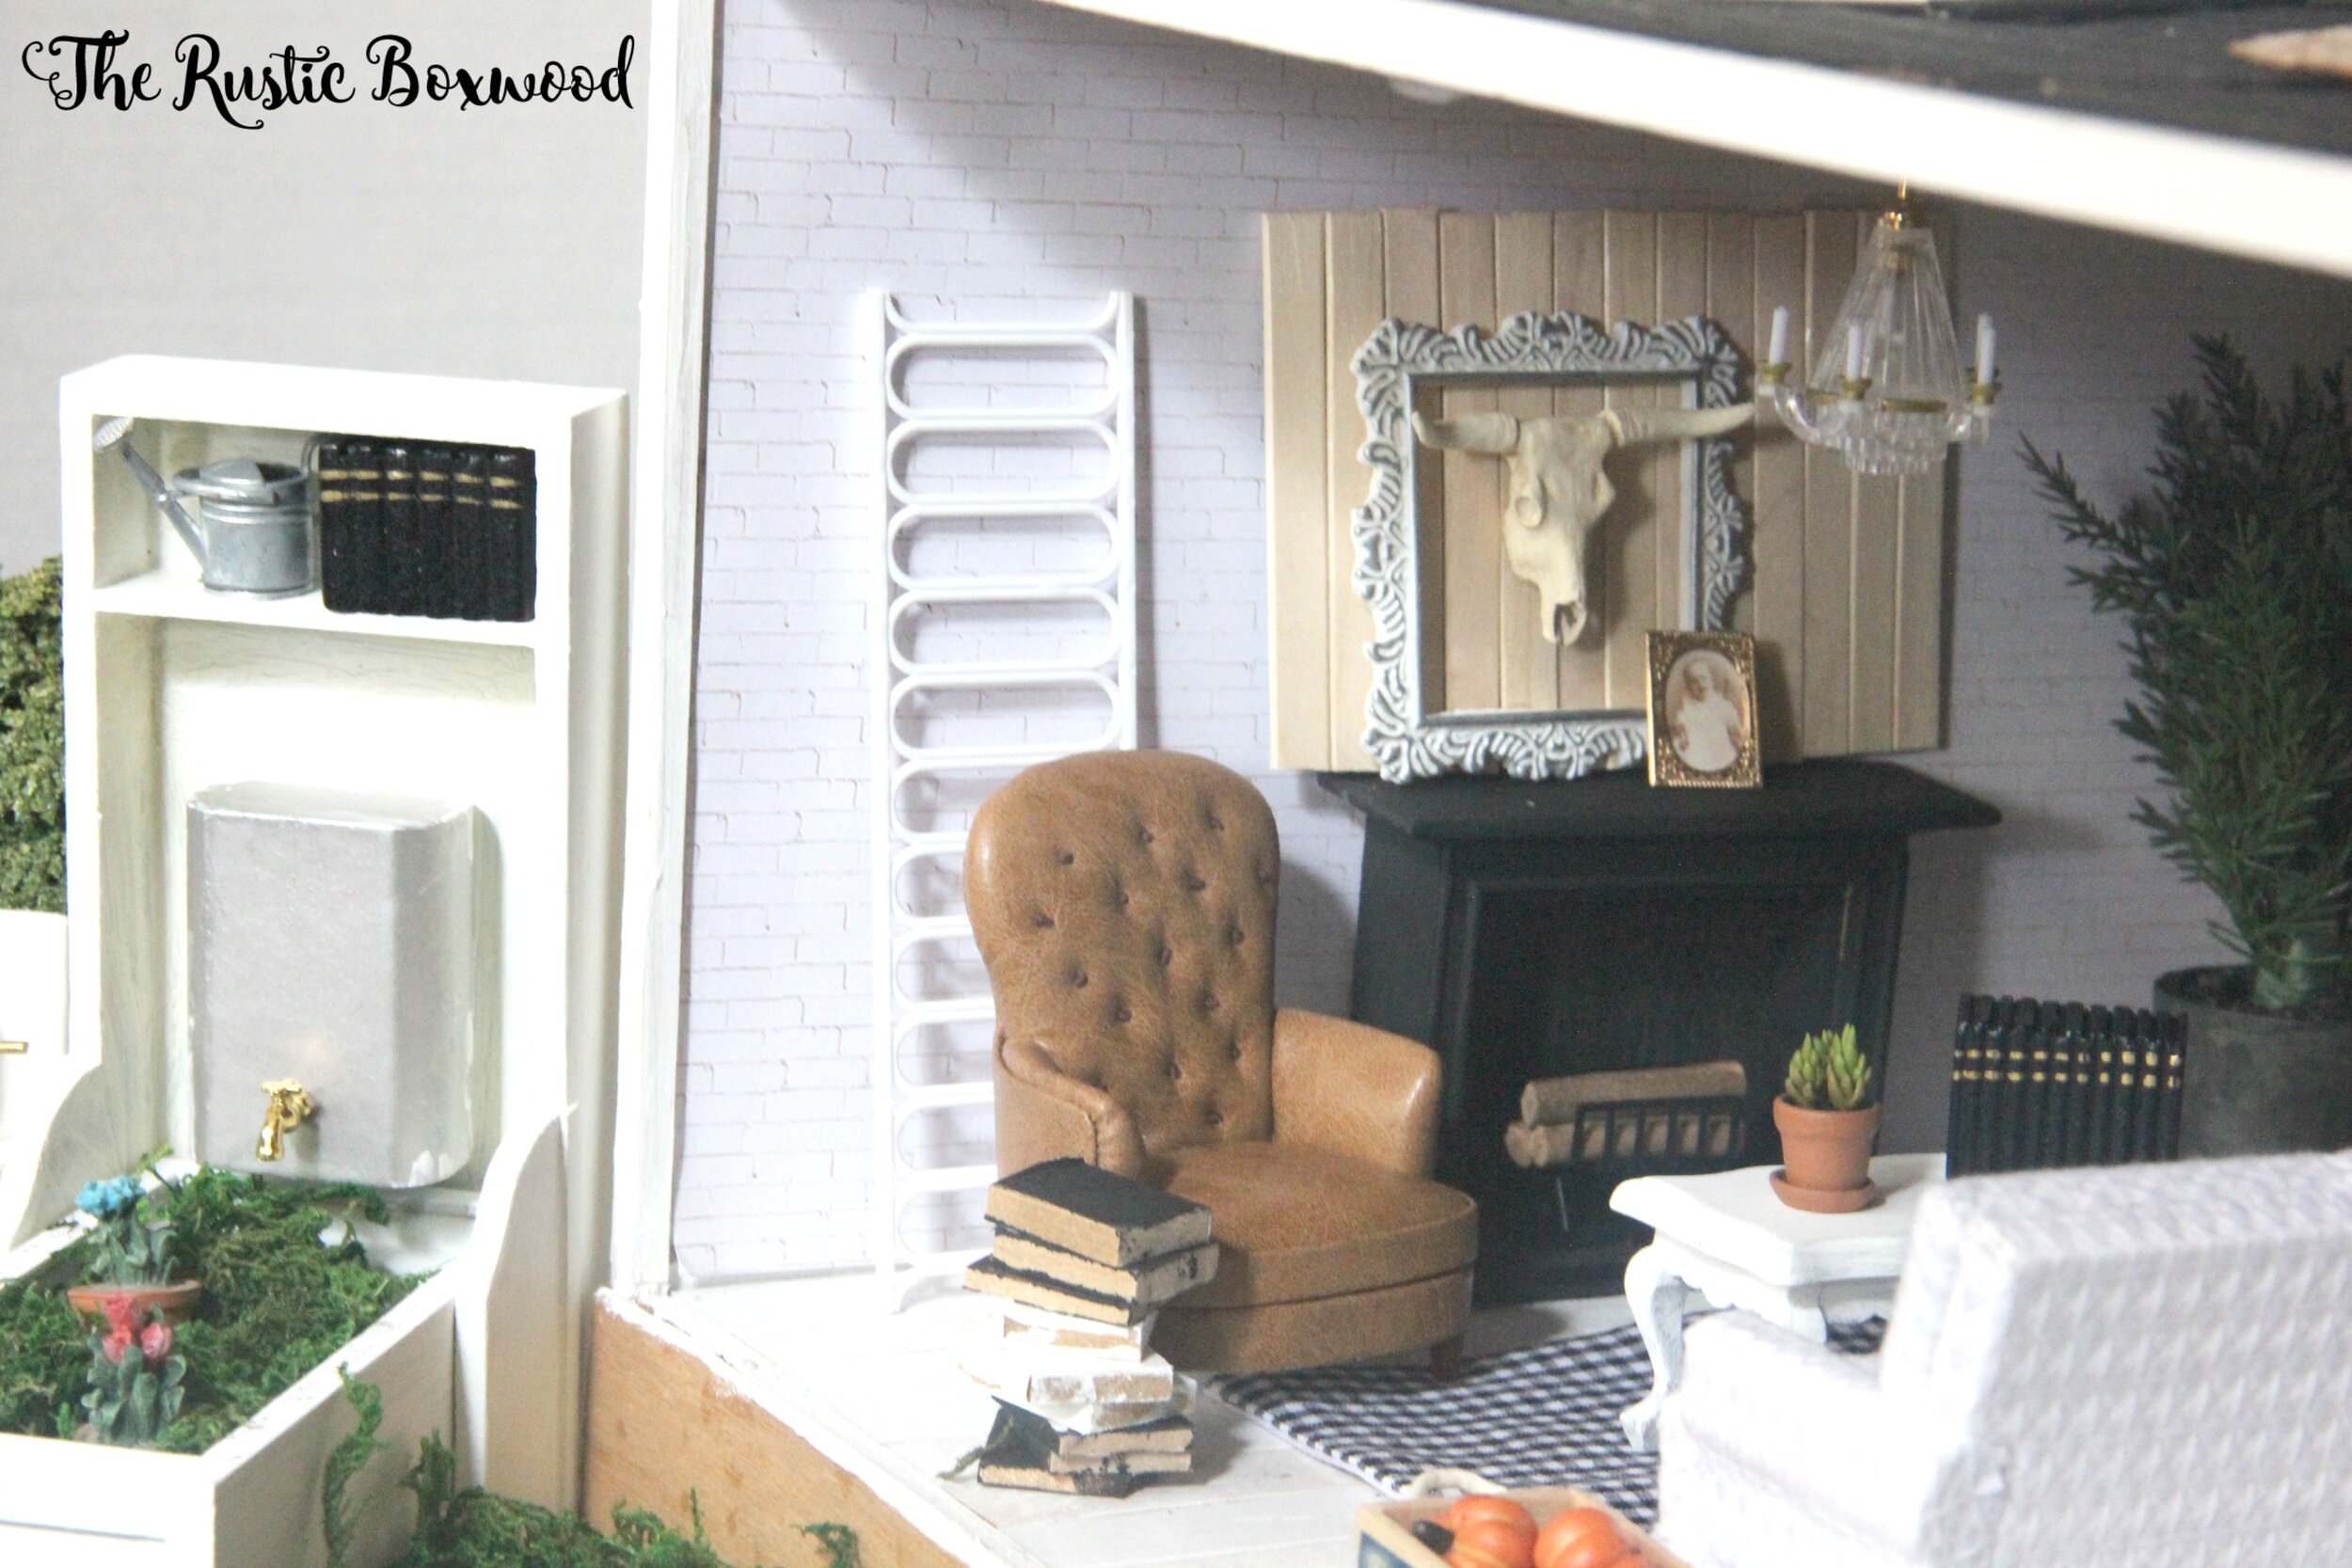
The accessories in the pic below are almost all from Miniatures.com! First, the euro mount is actually a Longhorn skull, and I just glued it to the leftover popsicle sticks that I glued to a piece of cardboard. The little white frame is from my local crafts' store. And the little baby pic? It was also a fun find at Miniatures.com!
Oh, and the trendy potted houseleek on the coffee table looks so real! To add a little texture to the wall behind the fireplace, I simply taped a fit-to-size piece of faux-brick scrapbook paper.
And what about that tufted, leather "fireside" chair....Isn't it so cool?! That was my splurge for this project. ;) And the white "architecture" is actually a fencing piece that came as a set of 2. I just repurposed it into "architectural salvage." Another fun accessory is the fruit crate that's holding the pumpkins (in the pic above). It's a versatile piece that can be used throughout the dollhouse...as a centerpiece on the dining table, as a wall shelf, or even as storage for pumpkins. ;)
The chandelier is another cool light fixture that works! It looks just like the other chandy that's hanging in the kitchen, but it's got a wire instead of being battery-operated (and I just taped it to the ceiling). Super easy!
Outdoor Space
The last section of the dollhouse is this outdoor section that I added. The base that held the entire dollhouse set together is an antique bakery crate that I turned upside down. Then, I added some moss for the "grass." The black fencing came as a 2-piece set and looks great "outdoors." And as I mentioned earlier, the feedsacks (or mill bags) came as a 6-piece set, and I've used them in a variety of ways -- as a throw pillow, as decor inside a crate, and even as a dishtowel.
The murphy tub became the outdoor, raised bed for gardening. It's a great piece that was originally a darker wood finish, but a quick coat of chalk paint brightened it right up!
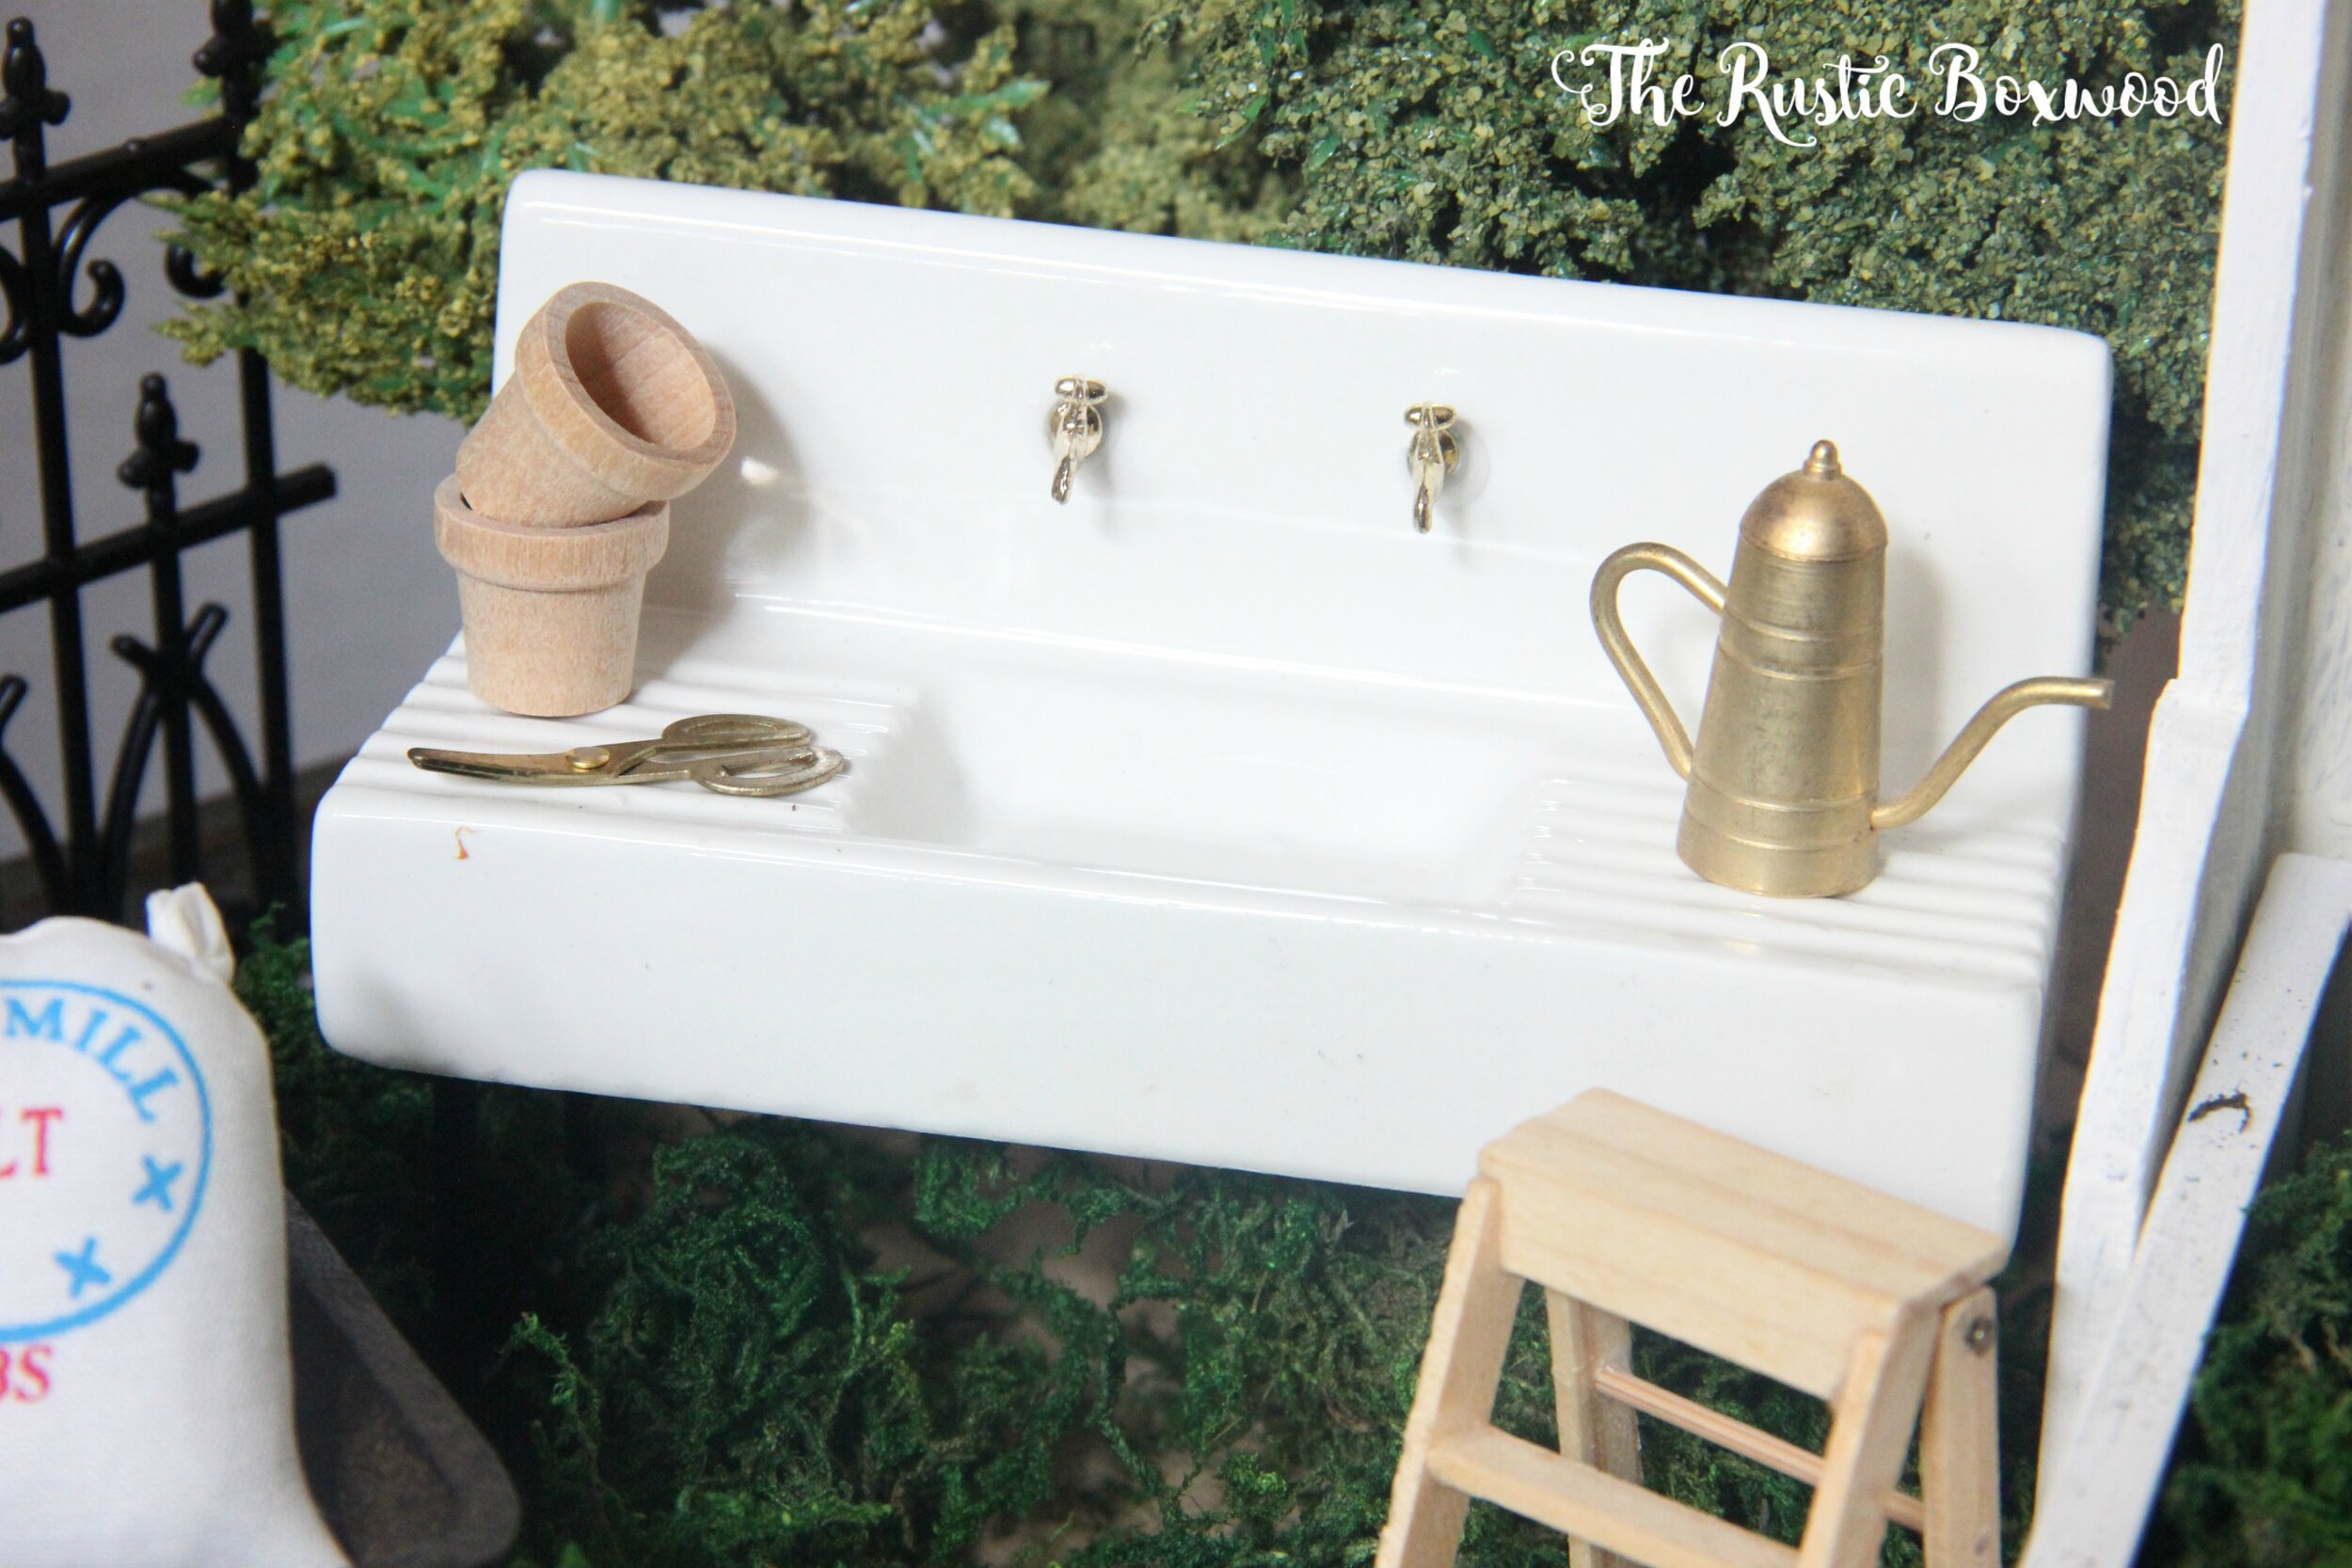
Of course, the 1920s porcelain sink and folding stepladder are some of my favorite minis! The sink stands on 4 black legs and would look awesome as a kitchen or bathroom sink, too!
Isn't this mini croquet set adorable? It reminds me of fun, summer nights with our kiddos, making memories in the backyard and playing a pleasant game of croquet.
Well, that's a wrap on the dollhouse reno! It's been a fun project to work on, and I'd do it all over again!
I have some exciting news for y'all! Miniatures.com wants to give away one $25 gift card to a lucky winner! Head to my Instagram page for all the details!
Also, this is a great time to do some shopping for Christmas gifts, and all of you get to save cash from your total purchase with Miniatures.com! Check out these special coupon codes for your shopping pleasure --
WFB3719
Pick the Date for 15% Off Order
Now – until 12/15 11:59 p.m. ET
WFB3720
26% Off Entire Order
12/28 at 12:00 a.m. ET – 12/28 at 11:59 p.m. ET
Yay for big sales!
What was your favorite piece that you noticed from Miniatures? I'd love to hear about it! Comment below or stop by Instagram, Facebook and Pinterest, and say hey! Have a wonderful day!
You might also like:
